The Take That Got Away
You’ve been there. The energy in the room is electric. Your band just locked into a groove so tight it feels like a single organism. The guitarist hits a solo that’s pure, raw magic. Everyone’s grinning. That’s the one. That’s the keeper.
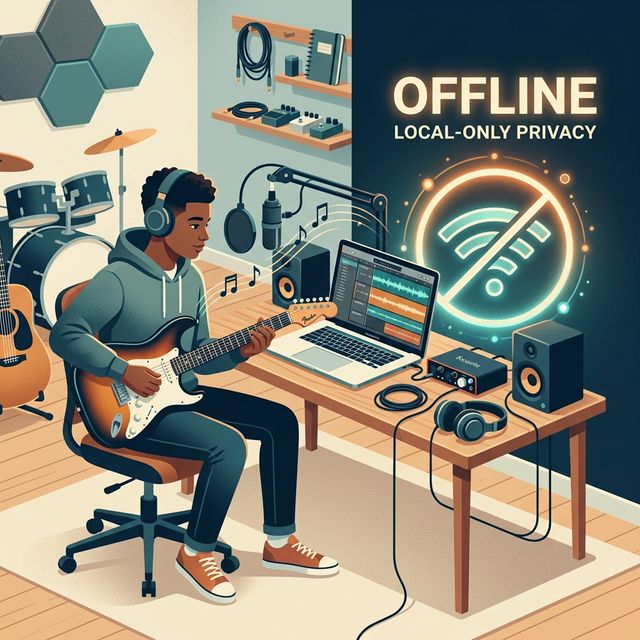
Then you look at the laptop screen. The recording software is frozen, a spinning beach ball of doom mocking your moment. Or worse, a tiny red notification: “Network connection lost. Sync paused.” The magic evaporates, replaced by the cold frustration of technical failure. The most inspired performances often happen when you’re furthest from a reliable internet connection, yet most recording software acts like it’s an office with gigabit fiber.
This isn’t about professional studio polish. It’s about capture. Your band’s demo should be a timestamp of your sound, your energy, and your ideas, preserved before they fade. The goal isn’t a chart-topping mix; it’s a honest document you can build from, share with a potential drummer, or listen back to in the van. And to do that reliably, you need to cut the cord and learn how to record a band demo offline.

Why Offline Recording Is a Creative Feature
The music tech industry has spent a decade pushing everything to the cloud. Subscription-based Digital Audio Workstations (DAWs) promise seamless collaboration, automatic backups, and endless sound libraries. What they don’t advertise is the latency they introduce, the data they collect, and the fundamental instability of requiring a web connection for core creative work.
When we researched the landscape of music apps for everyday creators, one pattern stood out: the assumption that your creative process is data to be mined. Free apps often record your usage, the samples you download, and sometimes even audio snippets for “quality improvement.” Subscription models create an incentive to keep you in their ecosystem.
We believe music creation tools should be architected like a tape machine: always ready, completely private, and solely focused on the input from your microphone. The constraint of working offline eliminates variables. No auto-updates interrupting a session. No “license validation failed” messages. No fear that a demo idea might be algorithmically analyzed before you’ve even decided you like it. Your creative space becomes a true sandbox.
This philosophy leads to a crucial technical advantage: zero-latency monitoring. When a singer hears their voice through headphones with even a 20-millisecond delay, it’s disorienting and hurts their pitch. Cloud-based processing often adds this delay. Native, offline processing on your device’s own chip can eliminate it, making recording vocals and direct-instruments feel natural and immediate.
Your No-Frills, High-Fidelity Offline Setup
You don’t need a $10,000 studio to record a great-sounding demo. You need the right pieces, chosen for reliability over bells and whistles. This setup is built for a basement, a garage, or a remote cabin.
The Core Signal Chain:
- Microphones (2-4): Start with a couple of dynamic microphones (like the Shure SM57 or SM58). They’re durable, sound great on guitar amps and vocals, and reject background noise. Add a large-diaphragm condenser later for detailed acoustic guitar or room sounds.
- Audio Interface: This is your bridge between microphones and computer. Look for one with at least 4 microphone preamps. The Focusrite Scarlett 4i4 or PreSonus AudioBox 96 are workhorses. Your interface’s primary job is to convert analog sound to digital data with low latency and high fidelity—it doesn’t need an internet connection to do this.
- Computer: Almost any modern laptop or desktop will work for multi-track recording. The key is to disable Wi-Fi during sessions to prevent background processes from stealing CPU cycles and causing dreaded audio dropouts.
- Headphones & Splitters: You’ll need multiple pairs of closed-back headphones and a simple headphone amplifier splitter so everyone can hear the mix while recording.
- Cables & Stands: Don’t cheap out. Good cables prevent hum and crackle.

Choosing Software for an Offline Workflow
Your software choice dictates your workflow. For a band demo, you need a Digital Audio Workstation (DAW) that gets out of the way. Here’s what to prioritize:
- True Offline Operation: The software must install fully and never “phone home” to validate or function. All synthesizers, effects, and editing tools must be on your device.
- Low CPU Overhead: Complex, subscription DAWs are often bloated. You need something lean that dedicates maximum power to recording audio streams, not rendering animated interfaces.
- Simple File Management: Your project should be a single folder on your hard drive: all audio files, the project file, and bounce-downs contained within. No proprietary cloud containers.
- One-Time Purchase: This aligns incentives. The developer’s job is done when you buy it. Your job is to make music with it, forever.
Most professional-grade DAWs (Logic Pro, Ableton Live, Reaper) actually fit this bill well—they are primarily offline tools. The danger lies in the ecosystem push: cloud-backed sample libraries, “AI” mastering that uploads your track, and collaborative features that mandate connectivity. The trick is to use a powerful tool while consciously disabling every cloud-centric feature, treating it as a sophisticated local tape machine.

7 Steps to Record Your Band Demo Offline
Let’s walk through a typical session to record a three-piece band (guitar, bass, drums, vocals).
1. Session Setup & Tracking Basics:
- Create a new project in your DAW and immediately save it to a dedicated folder on your internal drive (not an external drive for now).
- Set your sample rate (44.1 kHz is CD-standard) and bit depth (24-bit for headroom).
- Create tracks: Label them clearly (Kick, Snare, Overhead L, Bass DI, Guitar Amp, Vocals).
- Set up a click track (metronome). Agree on a tempo, even if it fluctuates slightly live. This is a demo, not a robot.
- Record the “bed tracks” first, typically drums and bass together to get a solid rhythm foundation. Then overdub guitar, then vocals.
2. The Philosophy of the “Demo Mix”: You’re not mixing for Spotify. You’re mixing for clarity. Use only three tools:
- Levels: Balance the volumes so every part is audible. The vocal should sit just on top.
- Panning: Place drum overheads left and right, bass and kick in the center, and guitar slightly off-center to make space.
- High-Pass Filter: On every track except kick and bass, apply a high-pass filter to cut out rumble below 80-100 Hz. This cleans up the mix instantly.
3. Bouncing Down: Creating Your Artifact: Once you have a balance you like, you’ll “bounce” or “export” the mix. This renders your multi-track project into a single stereo audio file.
- Choose WAV format for maximum quality (24-bit, 44.1 kHz). This is your archival master.
- Then, create an MP3 copy (320 kbps) for easy sharing via email or messaging.
- Your final deliverable is now in that project folder: a
.wavfile, an.mp3file, and the full project folder with all the raw tracks. Burn the WAV to a CD, put the MP3 on your phone. It’s tangible.
The value of a finished mixdown file you can hold—whether as an MP3 on your phone or a CD-R in your hand—cannot be overstated. It transforms the effort from an endless, tweakable project into a shareable artifact. It’s proof of work.

3 Quick Wins Before Your Next Practice
You don’t need to buy everything at once. Start here.
- Audition Your Space with a Voice Memo. Use your smartphone’s voice memo app. Record a minute of the drums in your practice space. Listen back on headphones. Hear the fluttery echo? That’s room reverb. Hang moving blankets or thick comforters on the walls behind the drums to deaden the sound. This free fix improves clarity more than an expensive mic.
- Establish a Single “Sound Source” for Your Click. Download a simple, loud metronome app on an old phone or tablet. Don’t have everyone listen to a different click in their headphones. Send the click from this one device into your headphone splitter. Consistency here prevents rhythmic drift.
- Do a “Line Check” and Save a Preset. Before you even think about recording, plug every microphone and instrument in. Get a good, clean level on each channel in your interface (aiming for the green/yellow zone, never hitting solid red). Then, take a photo of the interface’s gain knobs or save the scene if it has memory. This saves 15 minutes of fiddling next time, letting you get to the music faster.
These small, procedural fixes often yield a bigger improvement in results than buying new gear. They reduce friction, and reducing friction is the secret to capturing more music.
The Trade-Offs of an Offline Recording Workflow
Choosing an offline, local-first workflow is a deliberate trade. It’s essential to acknowledge both sides.
What You Gain:
- Absolute Reliability: No dropped sessions. Your recording rig works as long as your laptop has power.
- Zero-Latency Monitoring: Critical for confident vocal and instrumental performances.
- Complete Data Control: Your riffs, lyrics, and half-finished ideas exist only where you put them.
- One-Time Cost: The economics are simple. You pay for the tool once. The music you create with it has no ongoing tax.
- Focus: Without notifications, sync icons, or “new sample pack!” pop-ups, the software disappears, leaving you with the instrument and the meter.
What You Manage:
- Backups Are Your Responsibility. You must manually copy that project folder to an external hard drive or a cloud service you control (like Google Drive) after every session. This is non-negotiable. Hard drives fail.
- Collaboration is Asynchronous. You can’t have a bandmate in another city record a part live into your session. You send them the MP3, they record their part, and send back the audio file for you to drop in.
- Updates are Manual. You decide when to upgrade to a new version, which means you can stay in a stable, known environment for years.
This model isn’t for everyone. If your workflow depends on real-time collaboration across continents or access to a terabyte of streaming samples, the cloud-based model has a purpose. But for a band in a room, trying to capture the lightning in a bottle of their own sound, the simplicity and resilience of a local setup is usually the superior choice.

Why Your Demo’s Data Privacy Matters
Most music apps, even simple ones, share a troubling assumption: that your creative data is part of their asset base. Free mobile recorder apps are often bundled with SDKs that track which features you use. Subscription services can, in their terms, claim broad rights to anonymized usage data. For a demo containing raw, unpolished lyrics and personal musical ideas, this should give you pause.
When we explore building tools in this space, our stance is non-negotiable. The audio recorded through the microphone should never leave the device unless the user explicitly exports it to share. Processing should use the device’s native chip, not a remote server. A project file should be as portable and simple as a folder of WAVs and a text document of settings. This isn’t just about privacy; it’s about longevity. A project saved in a standard, open-ish format on your hard drive in 2024 will be recoverable in 2034, regardless of whether the software company exists, changes its model, or discontinues the service.
This philosophy leads to tools designed for a specific, vital purpose: capture. Not infinite tweaking. Not social features. Capture. The goal is to get you from the spark of an idea to a listenable, shareable stereo file with the minimum possible friction and the maximum possible reliability. It’s the digital equivalent of a four-track cassette recorder—limited, immediate, and endlessly creative within its bounds.
Ready to strip it back and just record? The principles here work with any software you can run offline. Learn how the same local-first, encrypted mindset applies to securing your other creative and personal data. For more on building systems that work for you, not against you, check out our guide on creating a personal data vault.
The best demo is the one that actually gets recorded. Stop fighting latency, updates, and logins. Set up a simple, offline chain and hit record. Give it a try at your next practice.